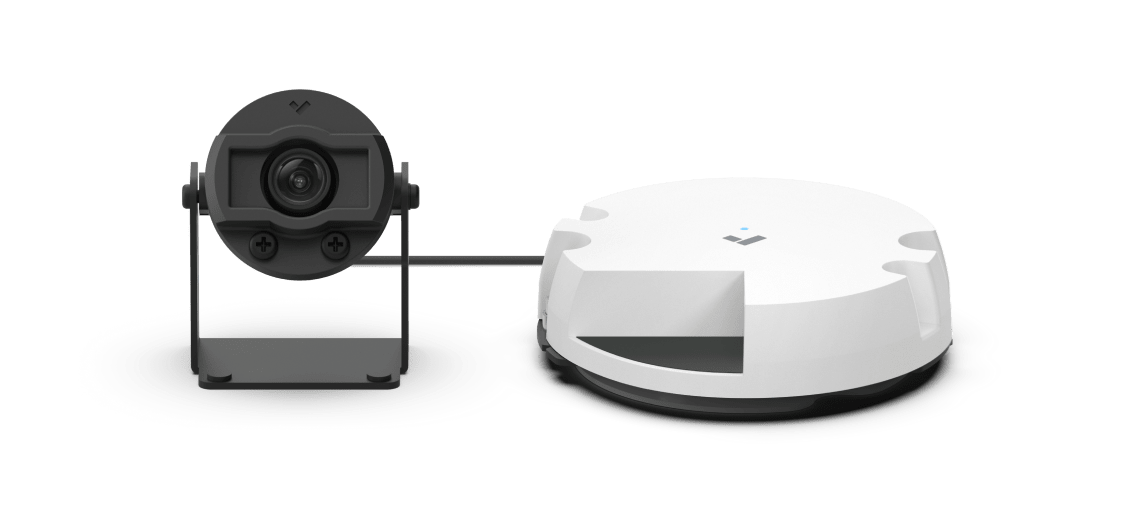
CM41-S Mini Split Camera
CM41-S What’s in the box
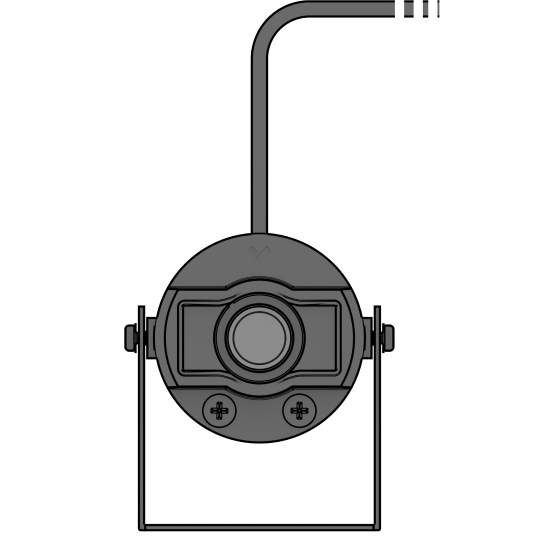
CM41-S Camera module
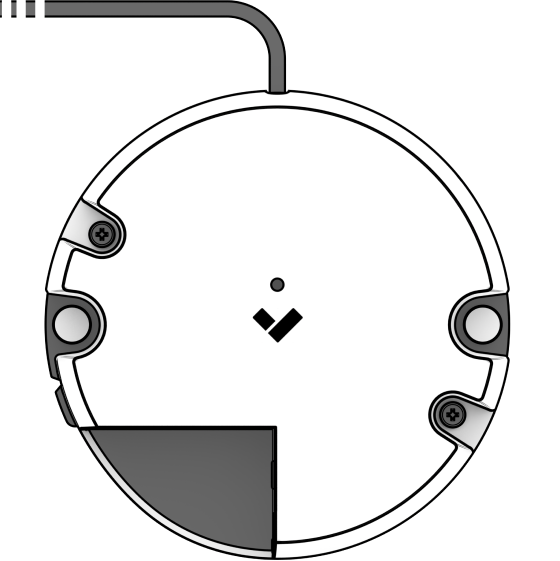
CM41-S Hub
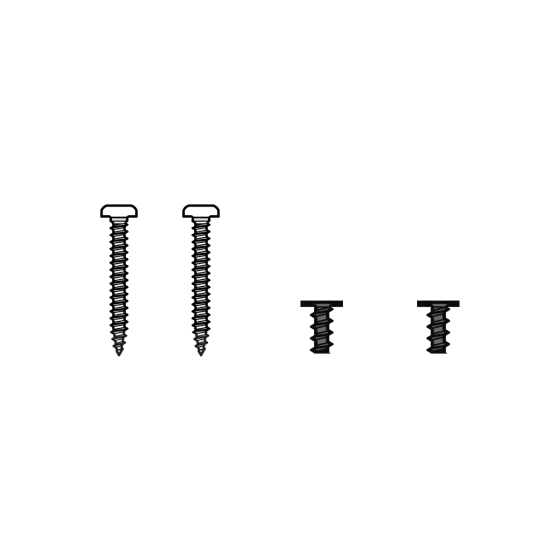
2 Camera module mounting screws & 2 Hub mounting screws
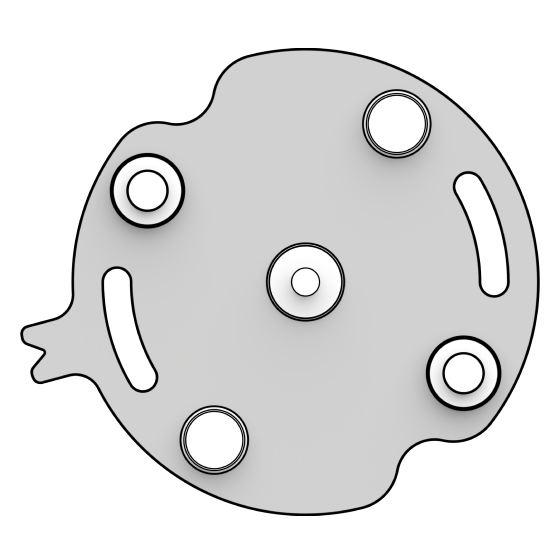
Mount Plate
CM41-S What you’ll need
- A working Internet connection
- 802.3af Power over Ethernet (PoE) switch, or a PoE injector
- A smartphone or laptop
- A Phillips screwdriver or power drill with a Phillips driver bit
- 1/8-inch (3mm) drill bit for pilot holes
CM41-S Connect

Connect the camera to an 802.3af Power over Ethernet port on your network. For camera registration and setup, proceed to www.verkada.com/start.
CM41-S LED Behavior
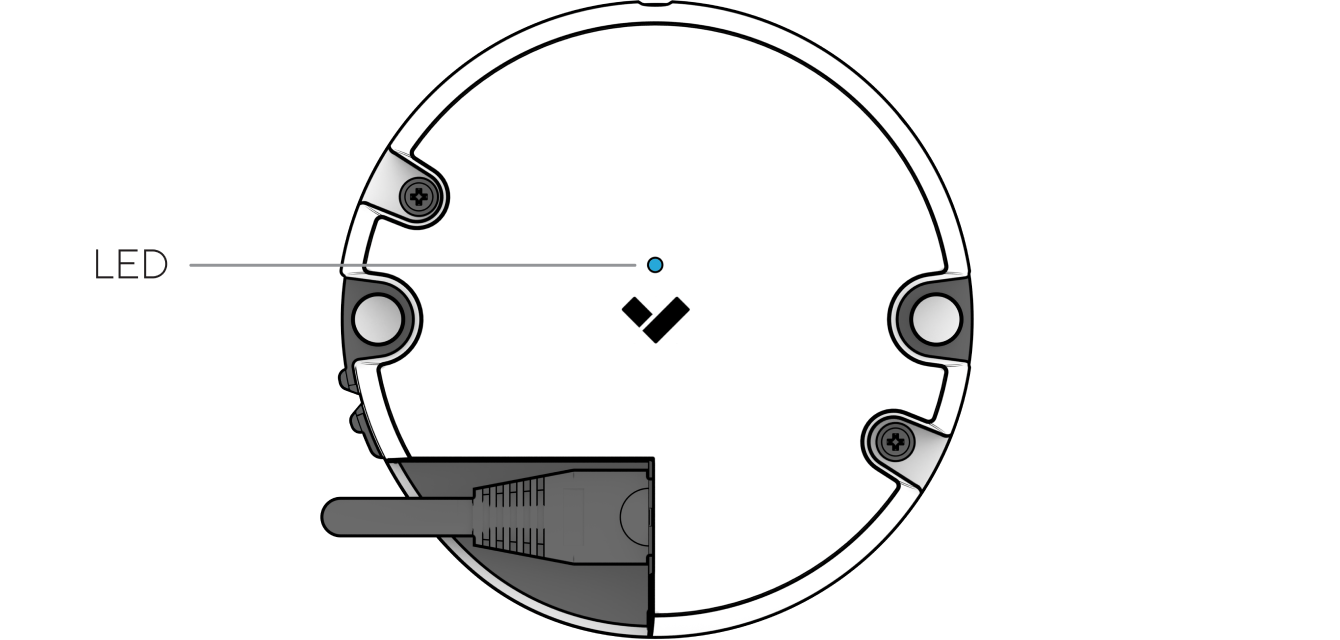
Solid Orange
Camera is on and booting up
Flashing Orange
Camera is updating firmware
Solid Blue
Camera is running, connected, and streaming video
Flashing Blue
Camera is recording, but cannot reach the server
CM41-S Hub Mounting
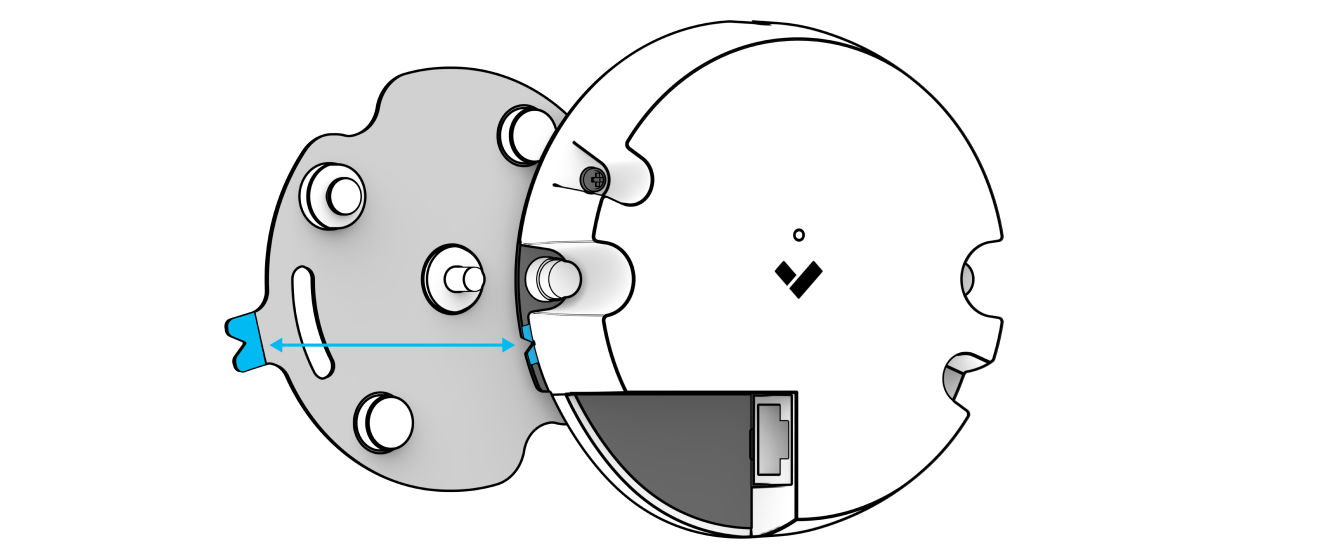
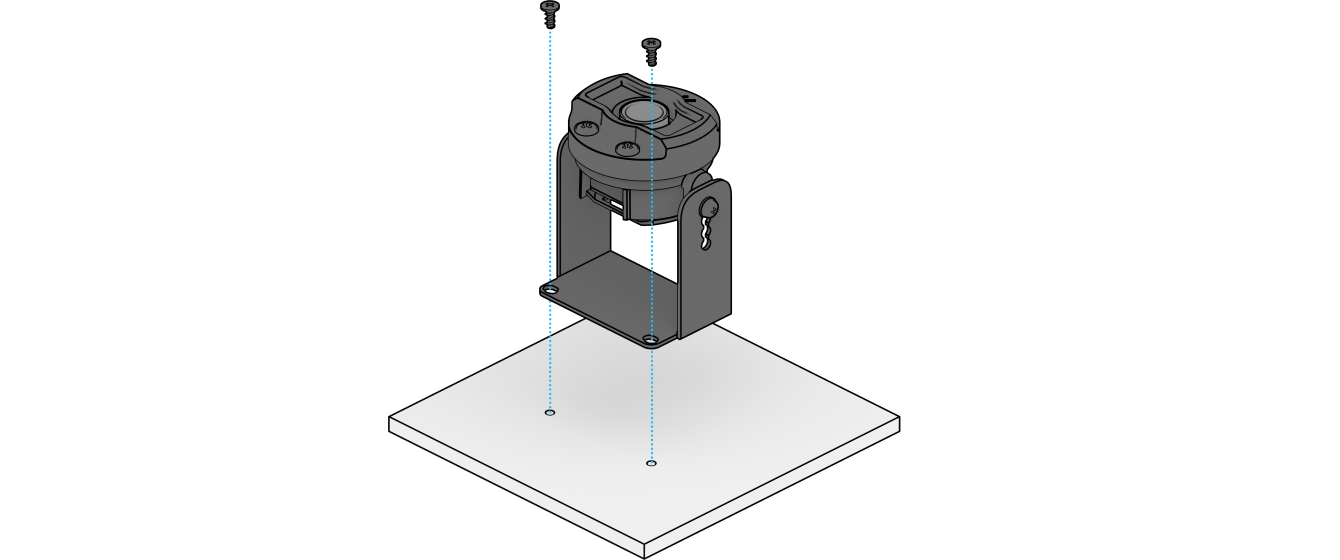
Ensure the blue notches on the hub and the mount plate are aligned, and pull to remove the mount plate.
Use the mount plate to mark holes for mounting screws.
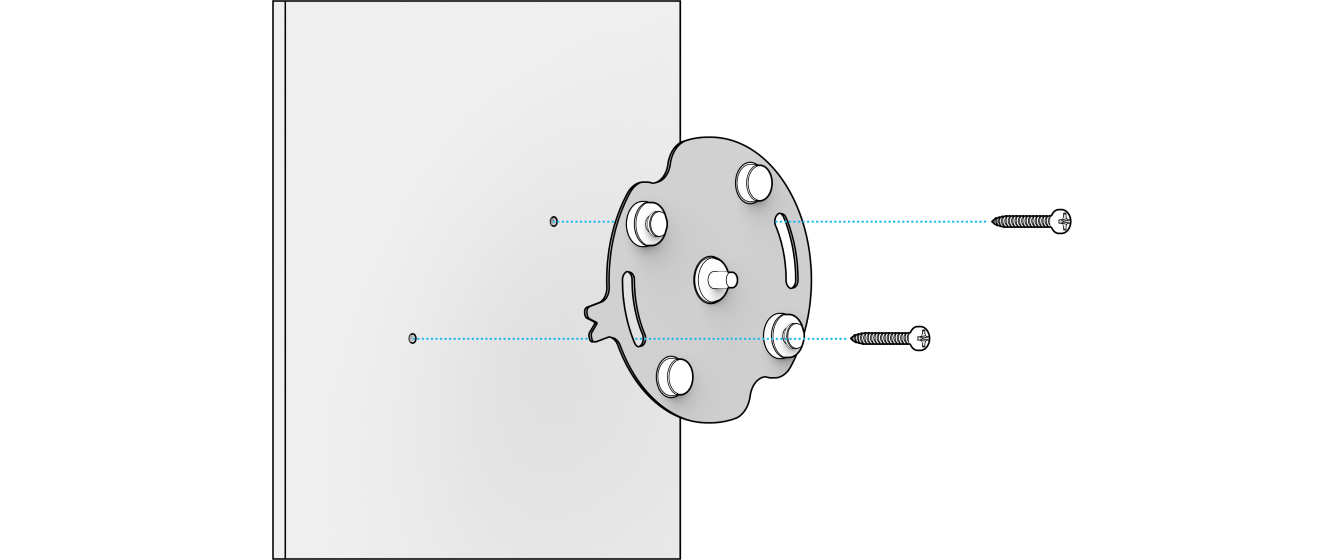
Drill 1/8 inch pilot holes. Drive the hub mounting screws through the mount plate directly into the the pilot holes.

Connect the RJ45 cable. Line up the blue notches on the mount plate and the hub and place the hub over the center pin on the mount plate.
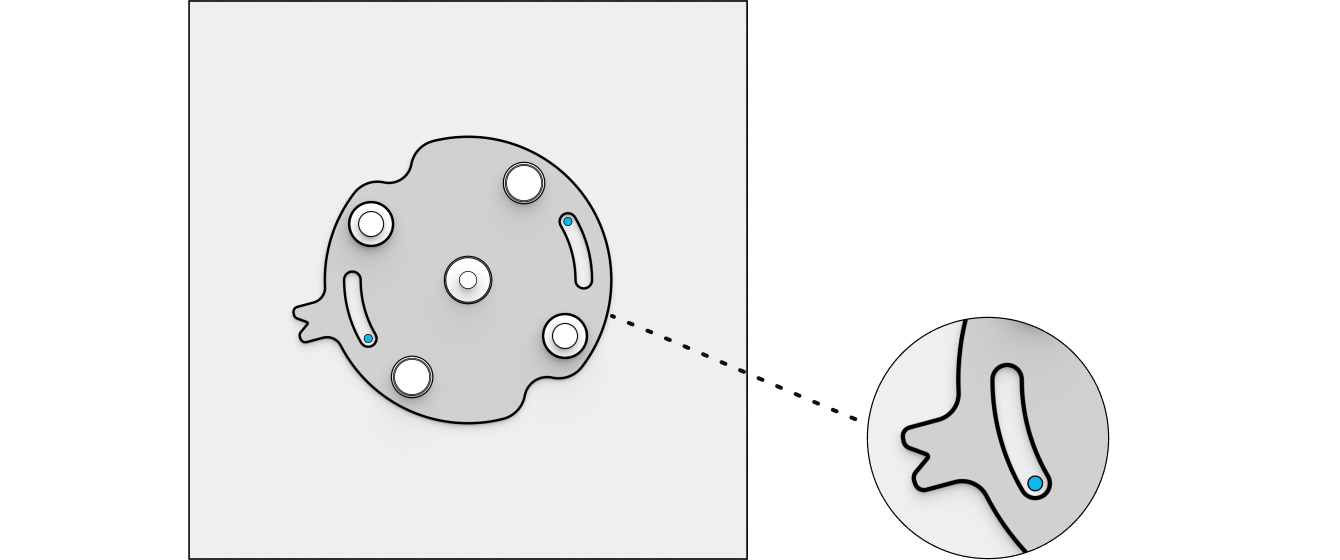
CM41-S Lens Module Mounting
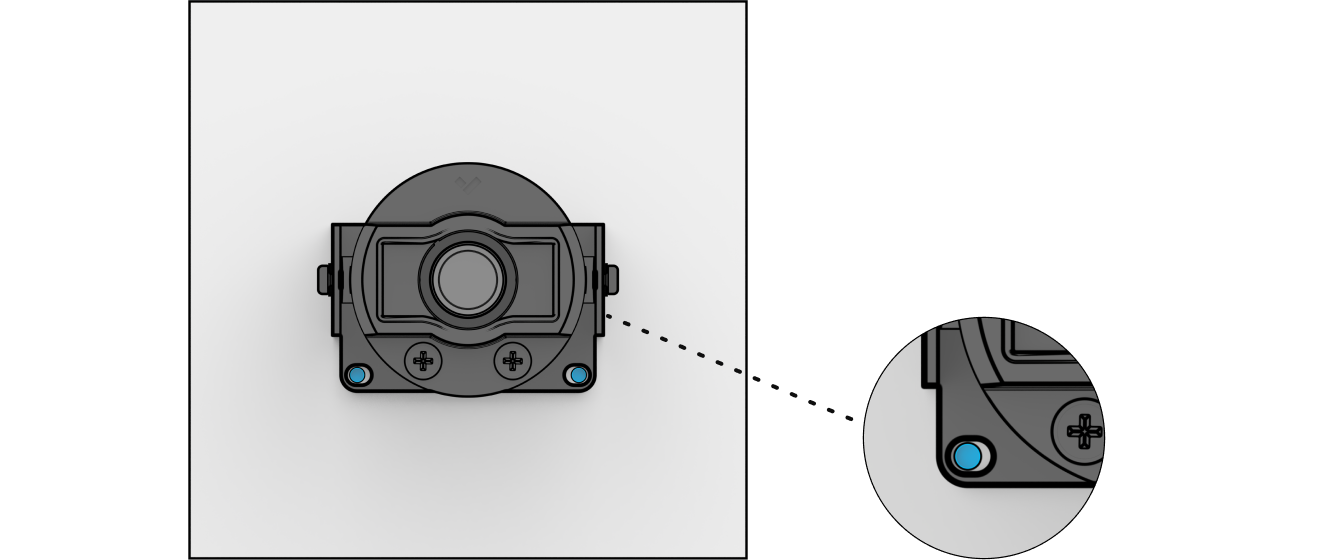
Place the camera module in the desired mounting position. Use the camera module mounting bracket to mark holes for mounting screws.
Drill 1/8 inch pilot holes. Drive the camera module mounting screws through the mounting bracket directly into the the pilot holes.

Adjust the camera module to the desired position and viewing angle.
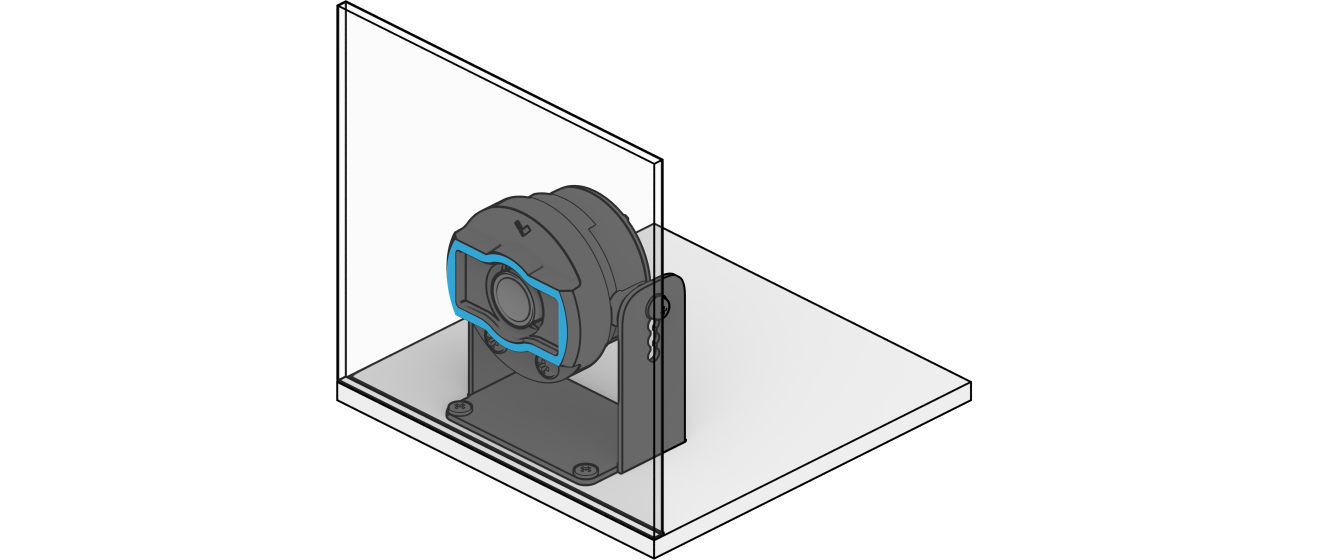
For installs against a transparent window, ensure that the flat portion of the lens rubber is pressed firmly against the surface of the window.
Caution
- Maintenance and repair work must always be carried out by qualified technical personnel. Disconnect power from the unit when performing a maintenance task.
- Wiring methods used for the connection of the equipment to earth shall be in accordance with the National Electrical Code,ANSI/ NFPA 70, and the Canadian Electrical Code, Part 1, CSA C22.1.
- The product must be installed and protected in a location that is not easily accessible, and is away from impacts or heavy vibration.
- The camera is only to be connected to PoE networks without routing to outside plants.
- If powered by a power adapter, the adapter should be properly grounded.
- Please contact certified dealers for power adapters.
Support
Thank you for purchasing a Verkada camera. If for any reason things don't work right or you need assistance, please contact us immediately.
Sincerely,